
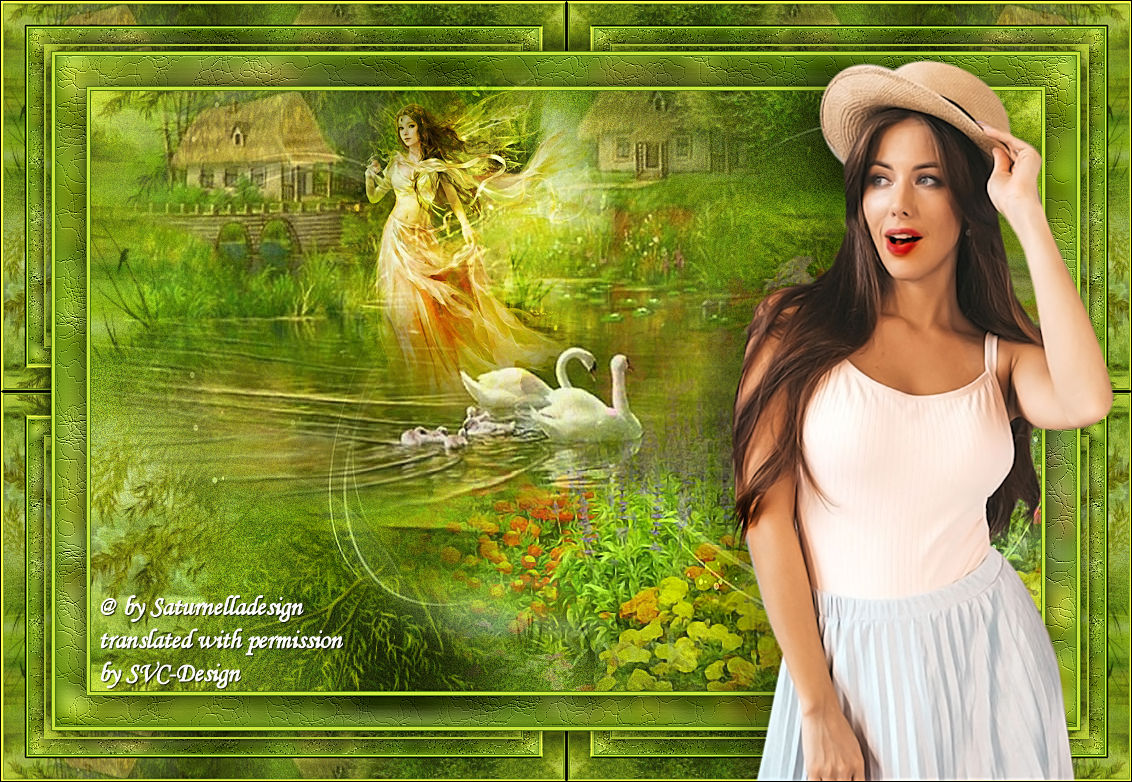
This lesson is made with PSPX9
But is good with other versions.
© by SvC-Design
Materialen Download :
Here
******************************************************************
Materials:
camp-27.pspimage
KjJLHbUg5USf5PsevfjshG_ltg0.pspimage
lac-6-sat.pspimage
sat-fem92.pspimage
sat-payfle08.pspimage
******************************************************************
Plugin:
Plugin - Mehdi- Grain Natural 2.0
Plugin - Graphic Plus - Quick Tile I
******************************************************************
color palette
:

******************************************************************
methode
When using other tubes and colors, the mixing mode and / or layer coverage may differ
******************************************************************
General Preparations:
First install your filters for your PSP!
Masks: Save to your mask folder in PSP, unless noted otherwise
Texture & Pattern: Save to your Texture Folder in PSP
Selections: Save to your folder Selections in PSP
Open your tubes in PSP
******************************************************************
We will start - Have fun!
Remember to save your work on a regular basis
******************************************************************
Foreground: color 1
Background: color 2
1.
Open a new transparent image of950x600pixels
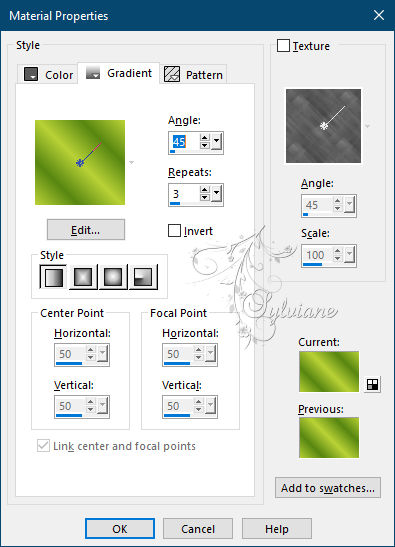
Fill with this gradient
2.
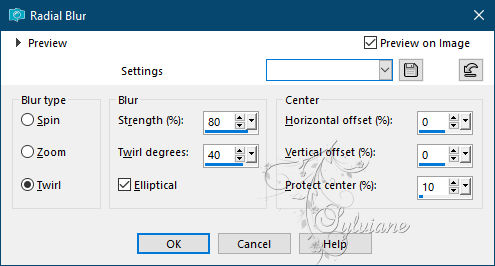
Adjust - blur - radial blur
3.
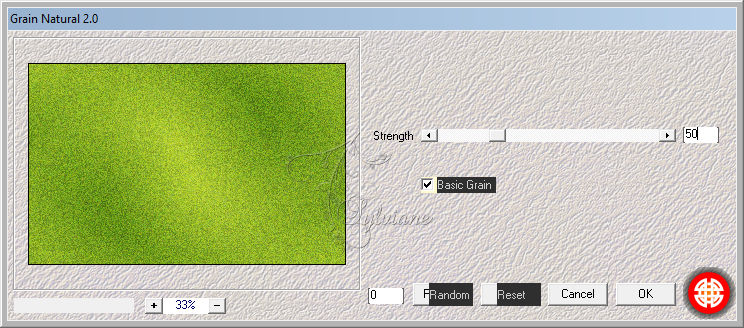
Plugin - Mehdi- Grain Natural 2.0
4.
Layers - New Raster Layer
Selection - Select All
Open camp-27.pspimage
Edit - Copy
Edit - Paste into selection
Selection - Select None
5.
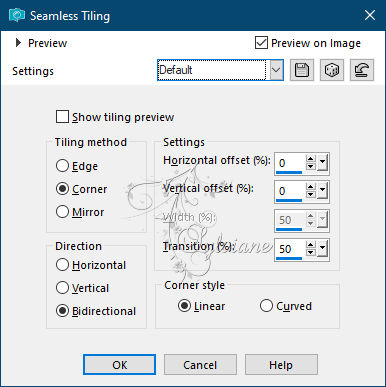
Effects - Image Effects - Seamless Tiling - default
6.
Open sat-payfle08.pspimage
Edit - Copy
Edit - Paste as new layer
Place at the bottom right
7.
Open camp-27.pspimage
Edit - Copy
Edit - Paste as new layer
It is well placed
Blend mode: Dodge
opacity 30
8.
Open lac-6-sat.pspimage
Edit - Copy
Edit - Paste as new layer
slide a little to the left as in the example
9.
Layers - New Raster Layer
Fill with color 3
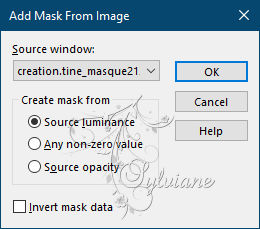
Layers - New Mask Layer - From Image - creation.tine_masque213.jpg
Effects - Edge Effects - Enhance
Layers - Merge - Merge Group
10.
Effects - 3D effects - Drop shadow
0/-30-75/30 color:#000000
Blending mode: Luminance (legacy)
opacity 60
Layers – arrange – move down
11.
Image - Add Borders -1 pxl - color 2
Image - Add Borders -3 pxls - color 1
Image - Add Borders -1 pxl - color 2
12.
Edit - copy
Selection - Select All
Image - Add Borders -30 pxls - color 3
Selections - Invert
Edit - Paste into selection
13.
Effects – texture effects – fine leather
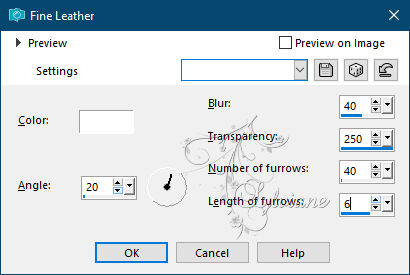
6
14.
Selections - Invert
Effects - 3D effects - Drop shadow
0/0/75/30 color:#000000
Selection - Select None
15.
Image - Add Borders -1 pxl - color 2
Image - Add Borders -3 pxls - color 1
Image - Add Borders -1 pxl - color 2
16.
Selection - Select All
Image - Add Borders -50 pxls - color 3
Selections - Invert
Edit - Paste into selection
17.
Effects – 3D effects – inner bevel

18.
Plugin - Graphic Plus - Quick Tile I
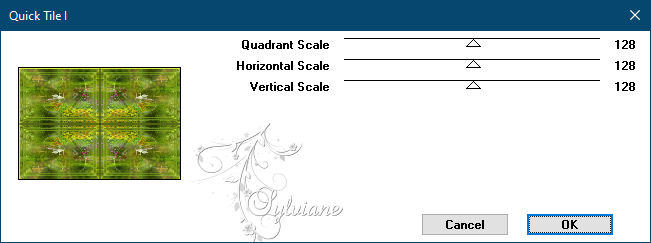
19.
Selections - Invert
Effects - 3D effects - Drop shadow
0/0/75/30 color:#000000
Selection - Select None
20.
Open KjJLHbUg5USf5PsevfjshG_ltg0.pspimage
Edit - Copy
Edit - Paste as new layer
I resized to 50%
Place at the top left
Blendmode: hard light
21.
Open sat-fem92.pspimage
Edit - Copy
Edit - Paste as new layer
I resized to 90%
Image - Mirror – mirror Horizontal
place it like in the example
22.
Effects - 3D effects - Drop shadow
0/-30/30/50 color:#000000
Image - Add Borders -1 pxl – color:#000000
Resize to 950 pxls wide
Adjust - sharpness - unsharp mask
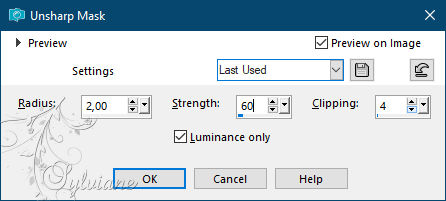
put your watermark on it
Layer – merge – merge all (flatten)
Save as JPEG
Back
Copyright Translation © 2021 by SvC-Design